
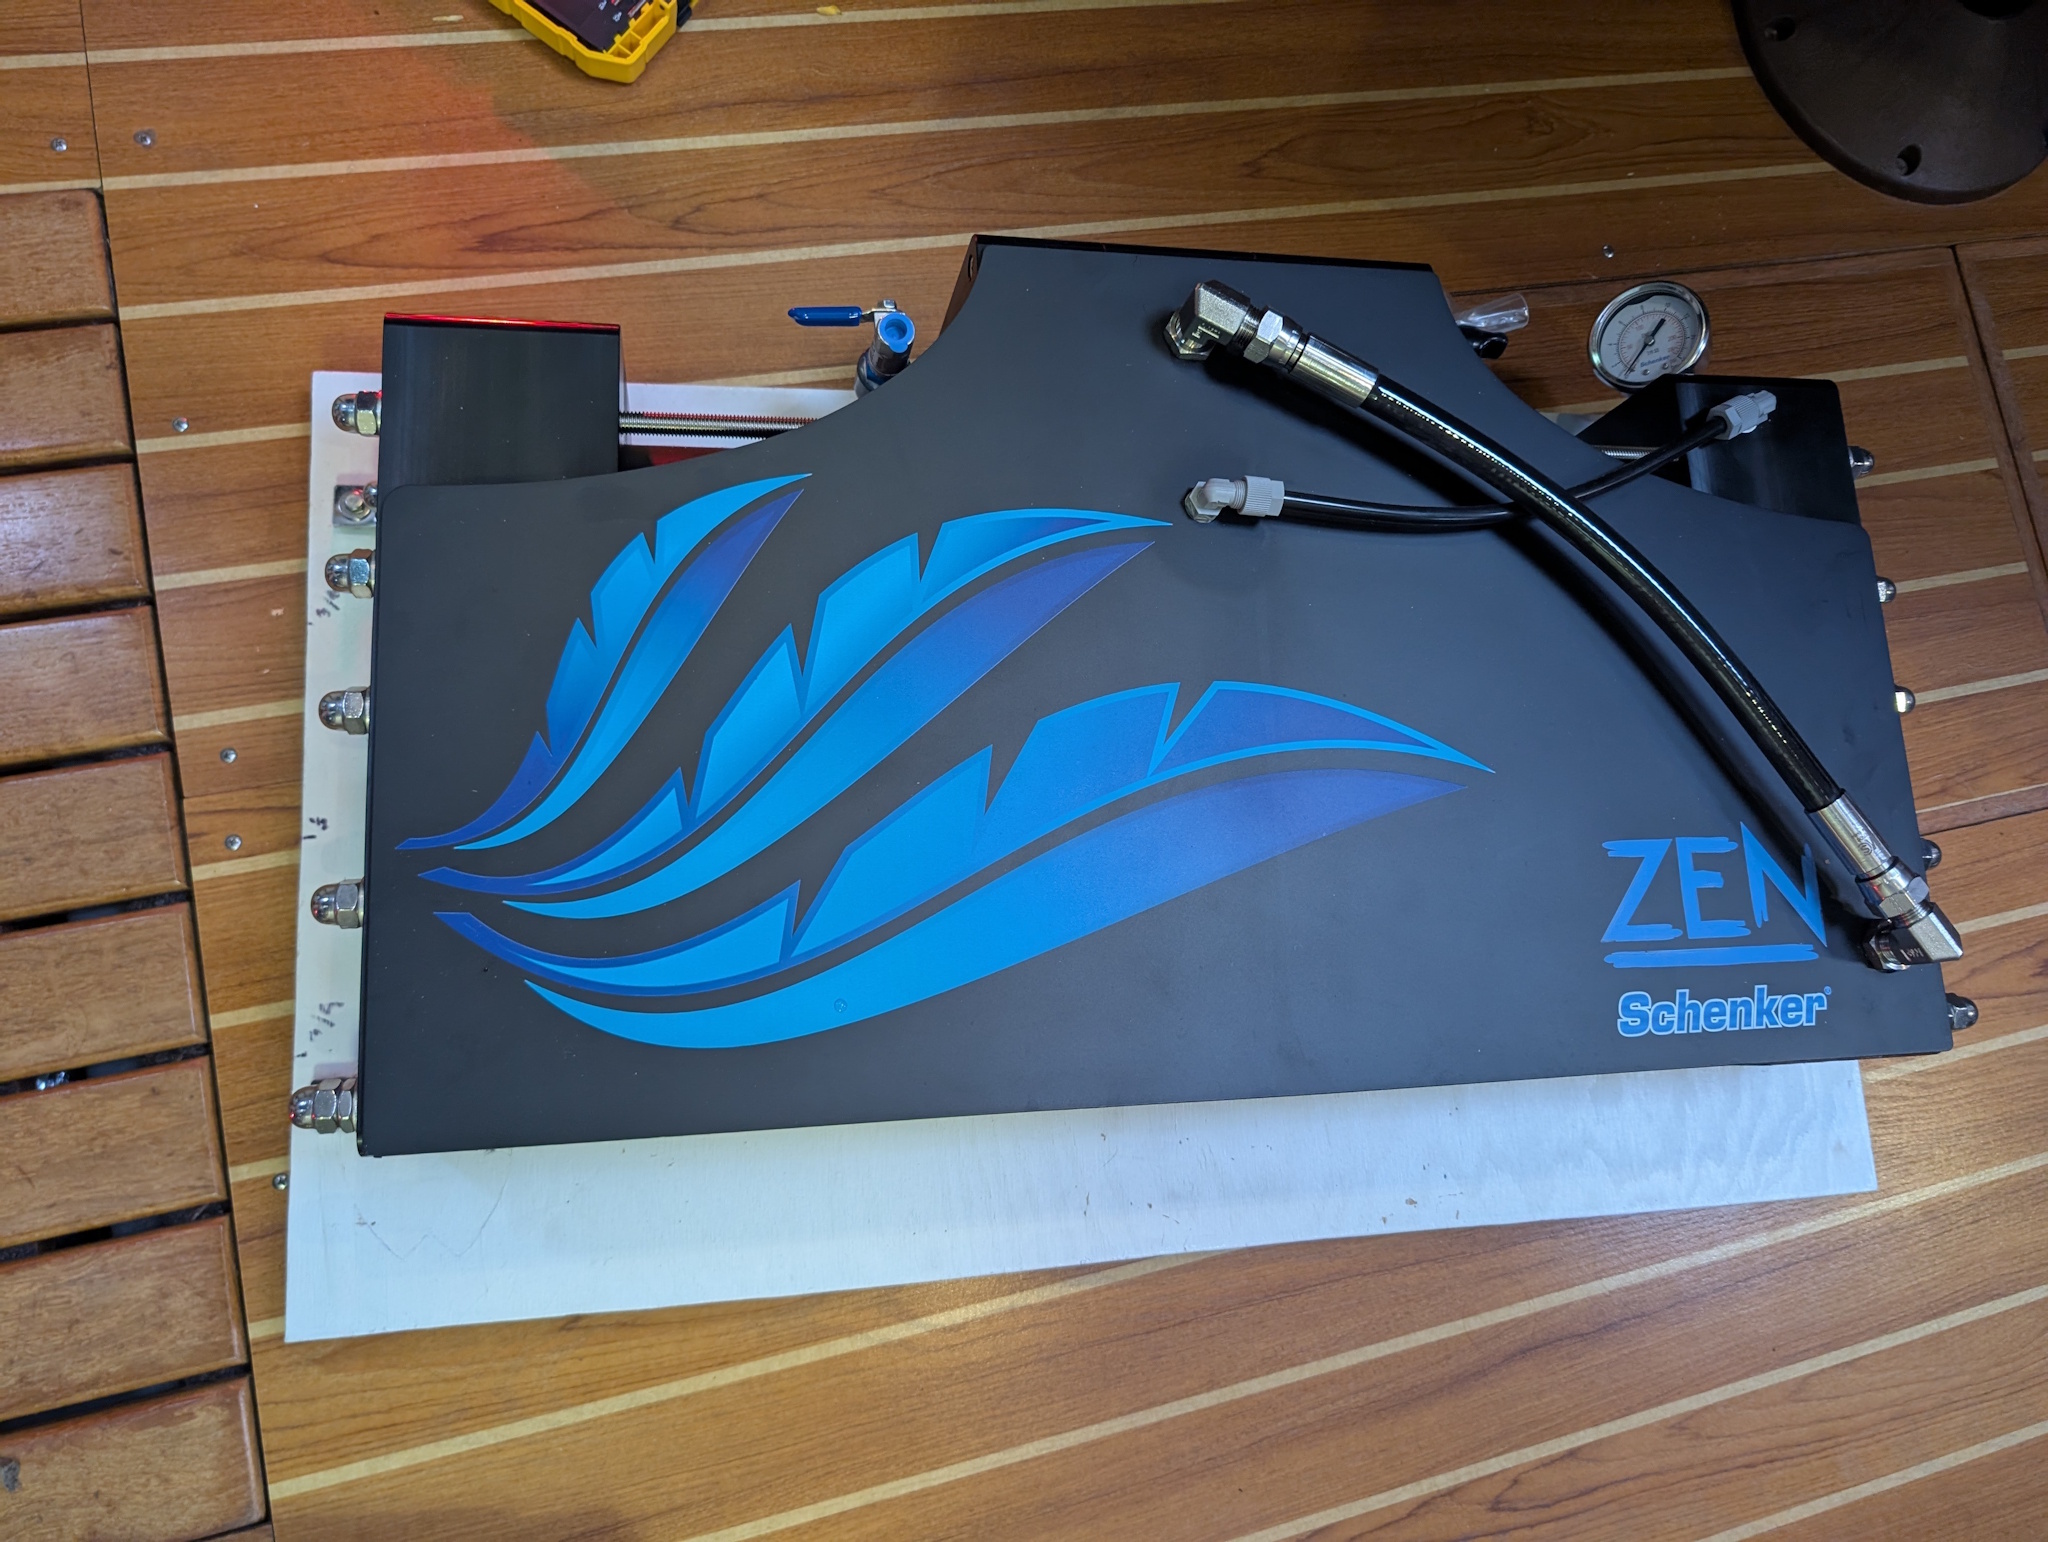
The other major installation task we needed to finish before untying the lines was our watermaker. In our case, we bought a Schenker Zen50 from CruiseRO. I honestly cannot recommend CruiseRO enough. The owner, Rich Boren, is helpful and responsive, and that can make all the difference when installing a system like this.
The most difficult part of installing a watermaker like this is figuring out where you’ll put things. Once you’ve got the location picked out, getting everything mounted is the next challenge. After that, the plumbing is easy. I ended up using (way over spec) 300 PSI rated hose from Nebar Hose & Fittings in Ballard, WA.
Installing a Schenker Zen50 on a Catalina 42
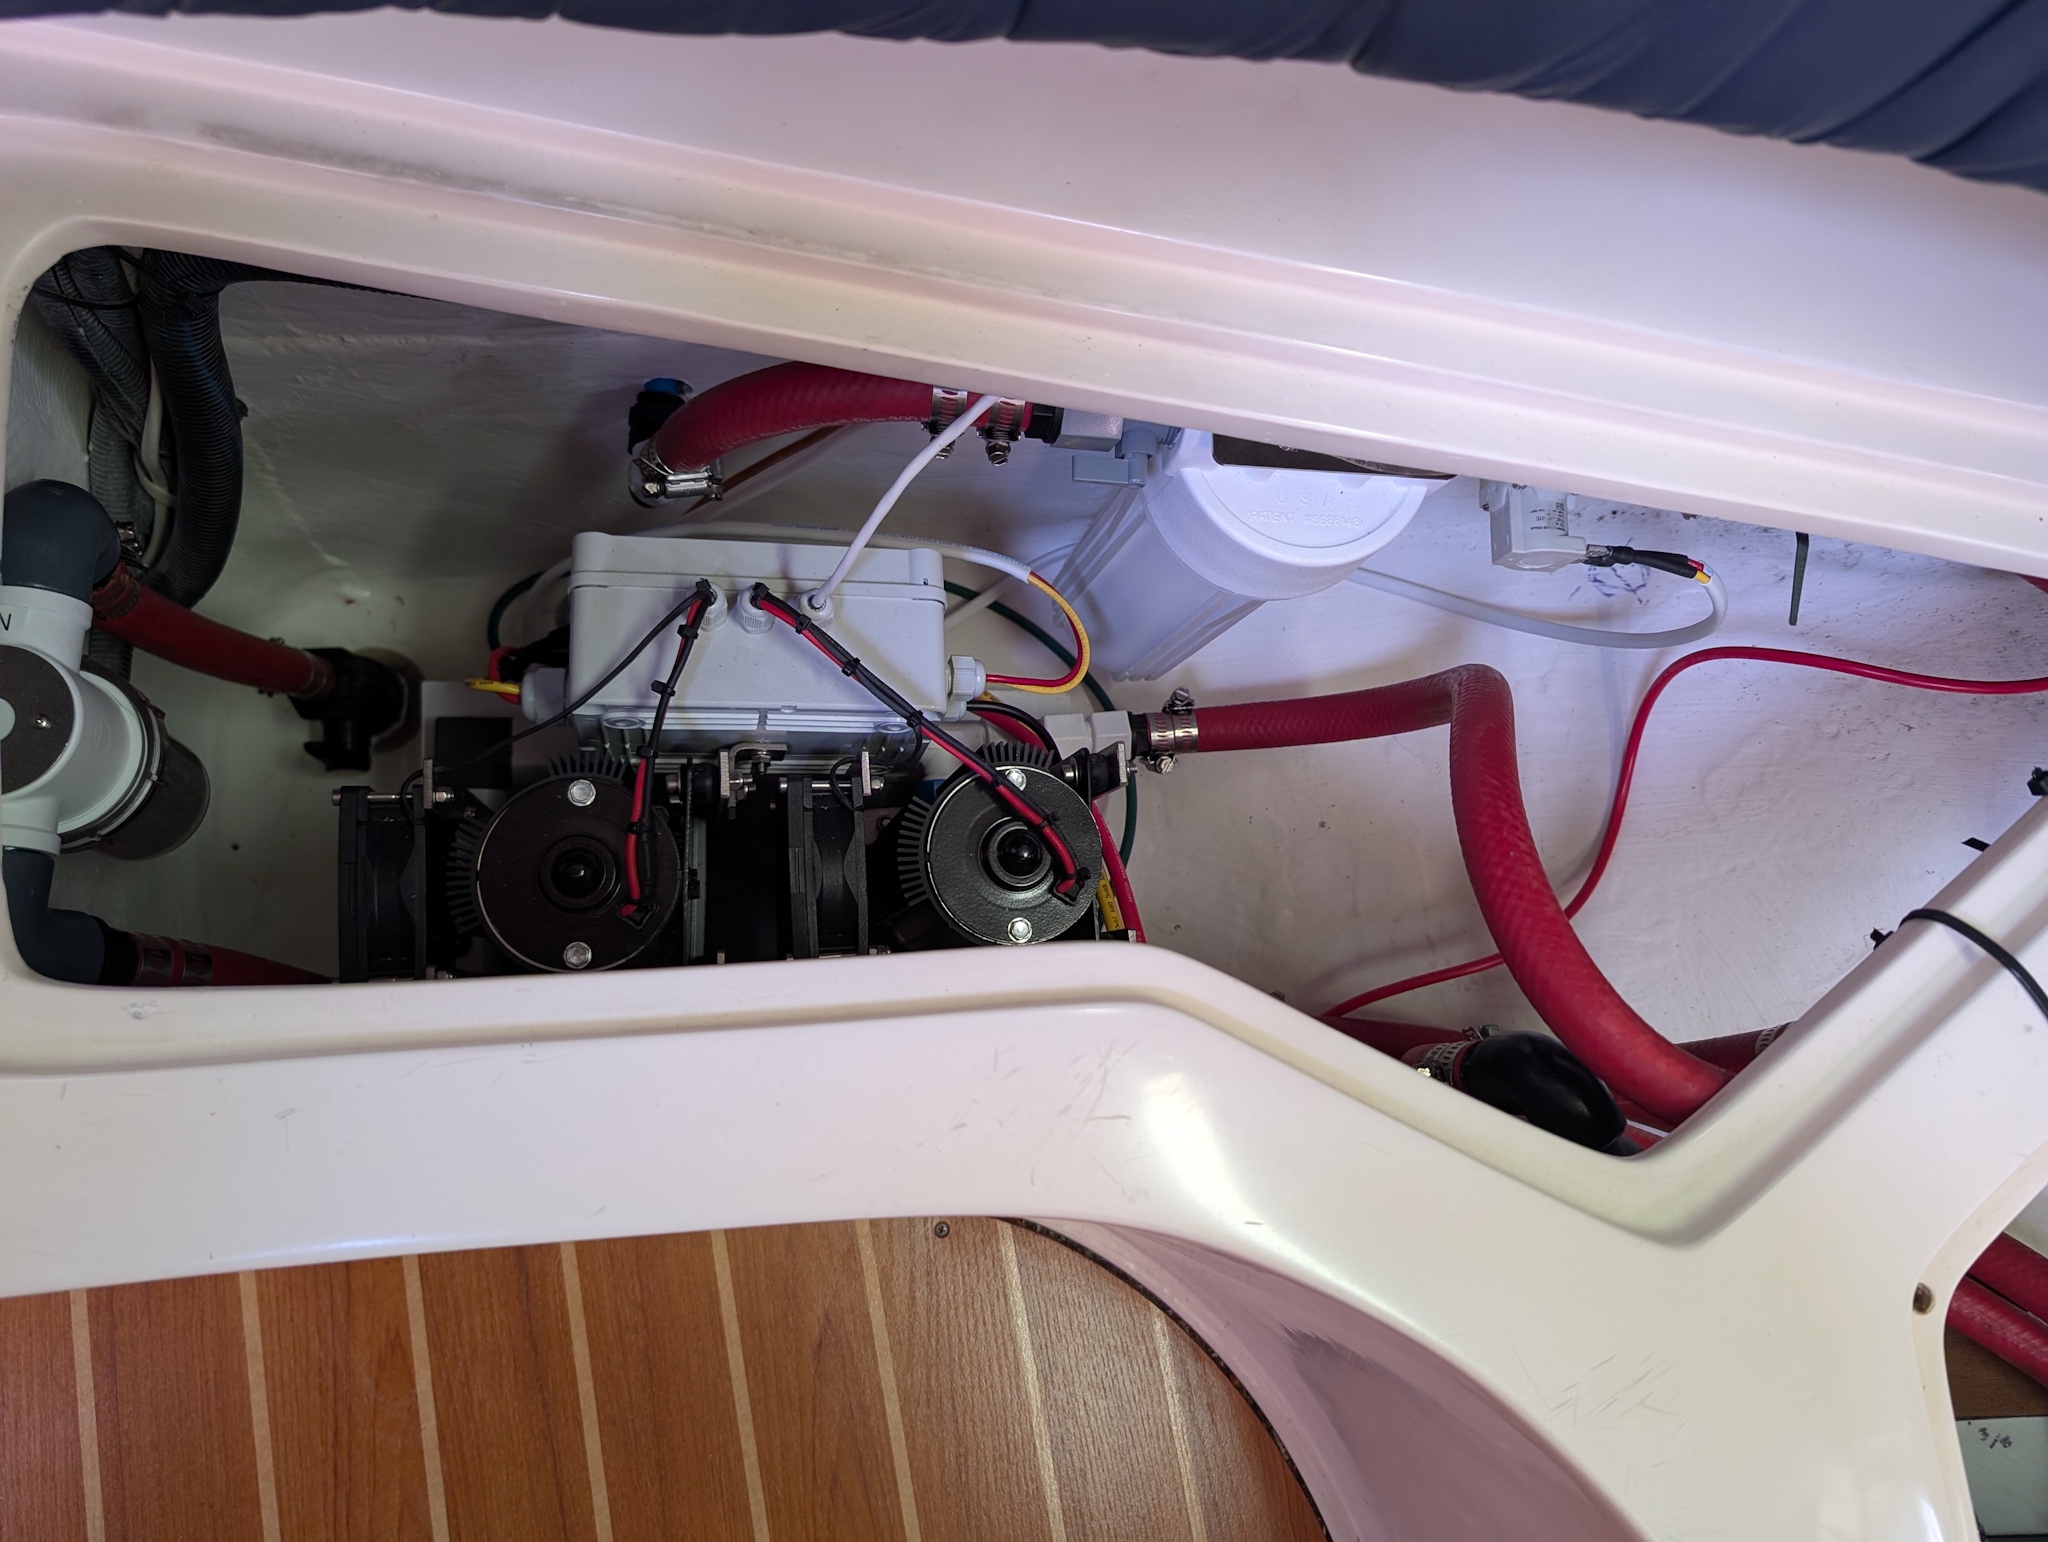
For the installation location, I chose the storage spots under the settees in the salon. (to be clear, if you’re a C42 owner reading this post, we have a 2-cabin pullman model, so your available locations may vary) Yes, we lose a fair bit of storage, but having essentially unlimited pure, fresh water is worth the sacrifice. The pump group is also sharing the space under one of the settees with the keel cooler for our Frigoboat freezer.
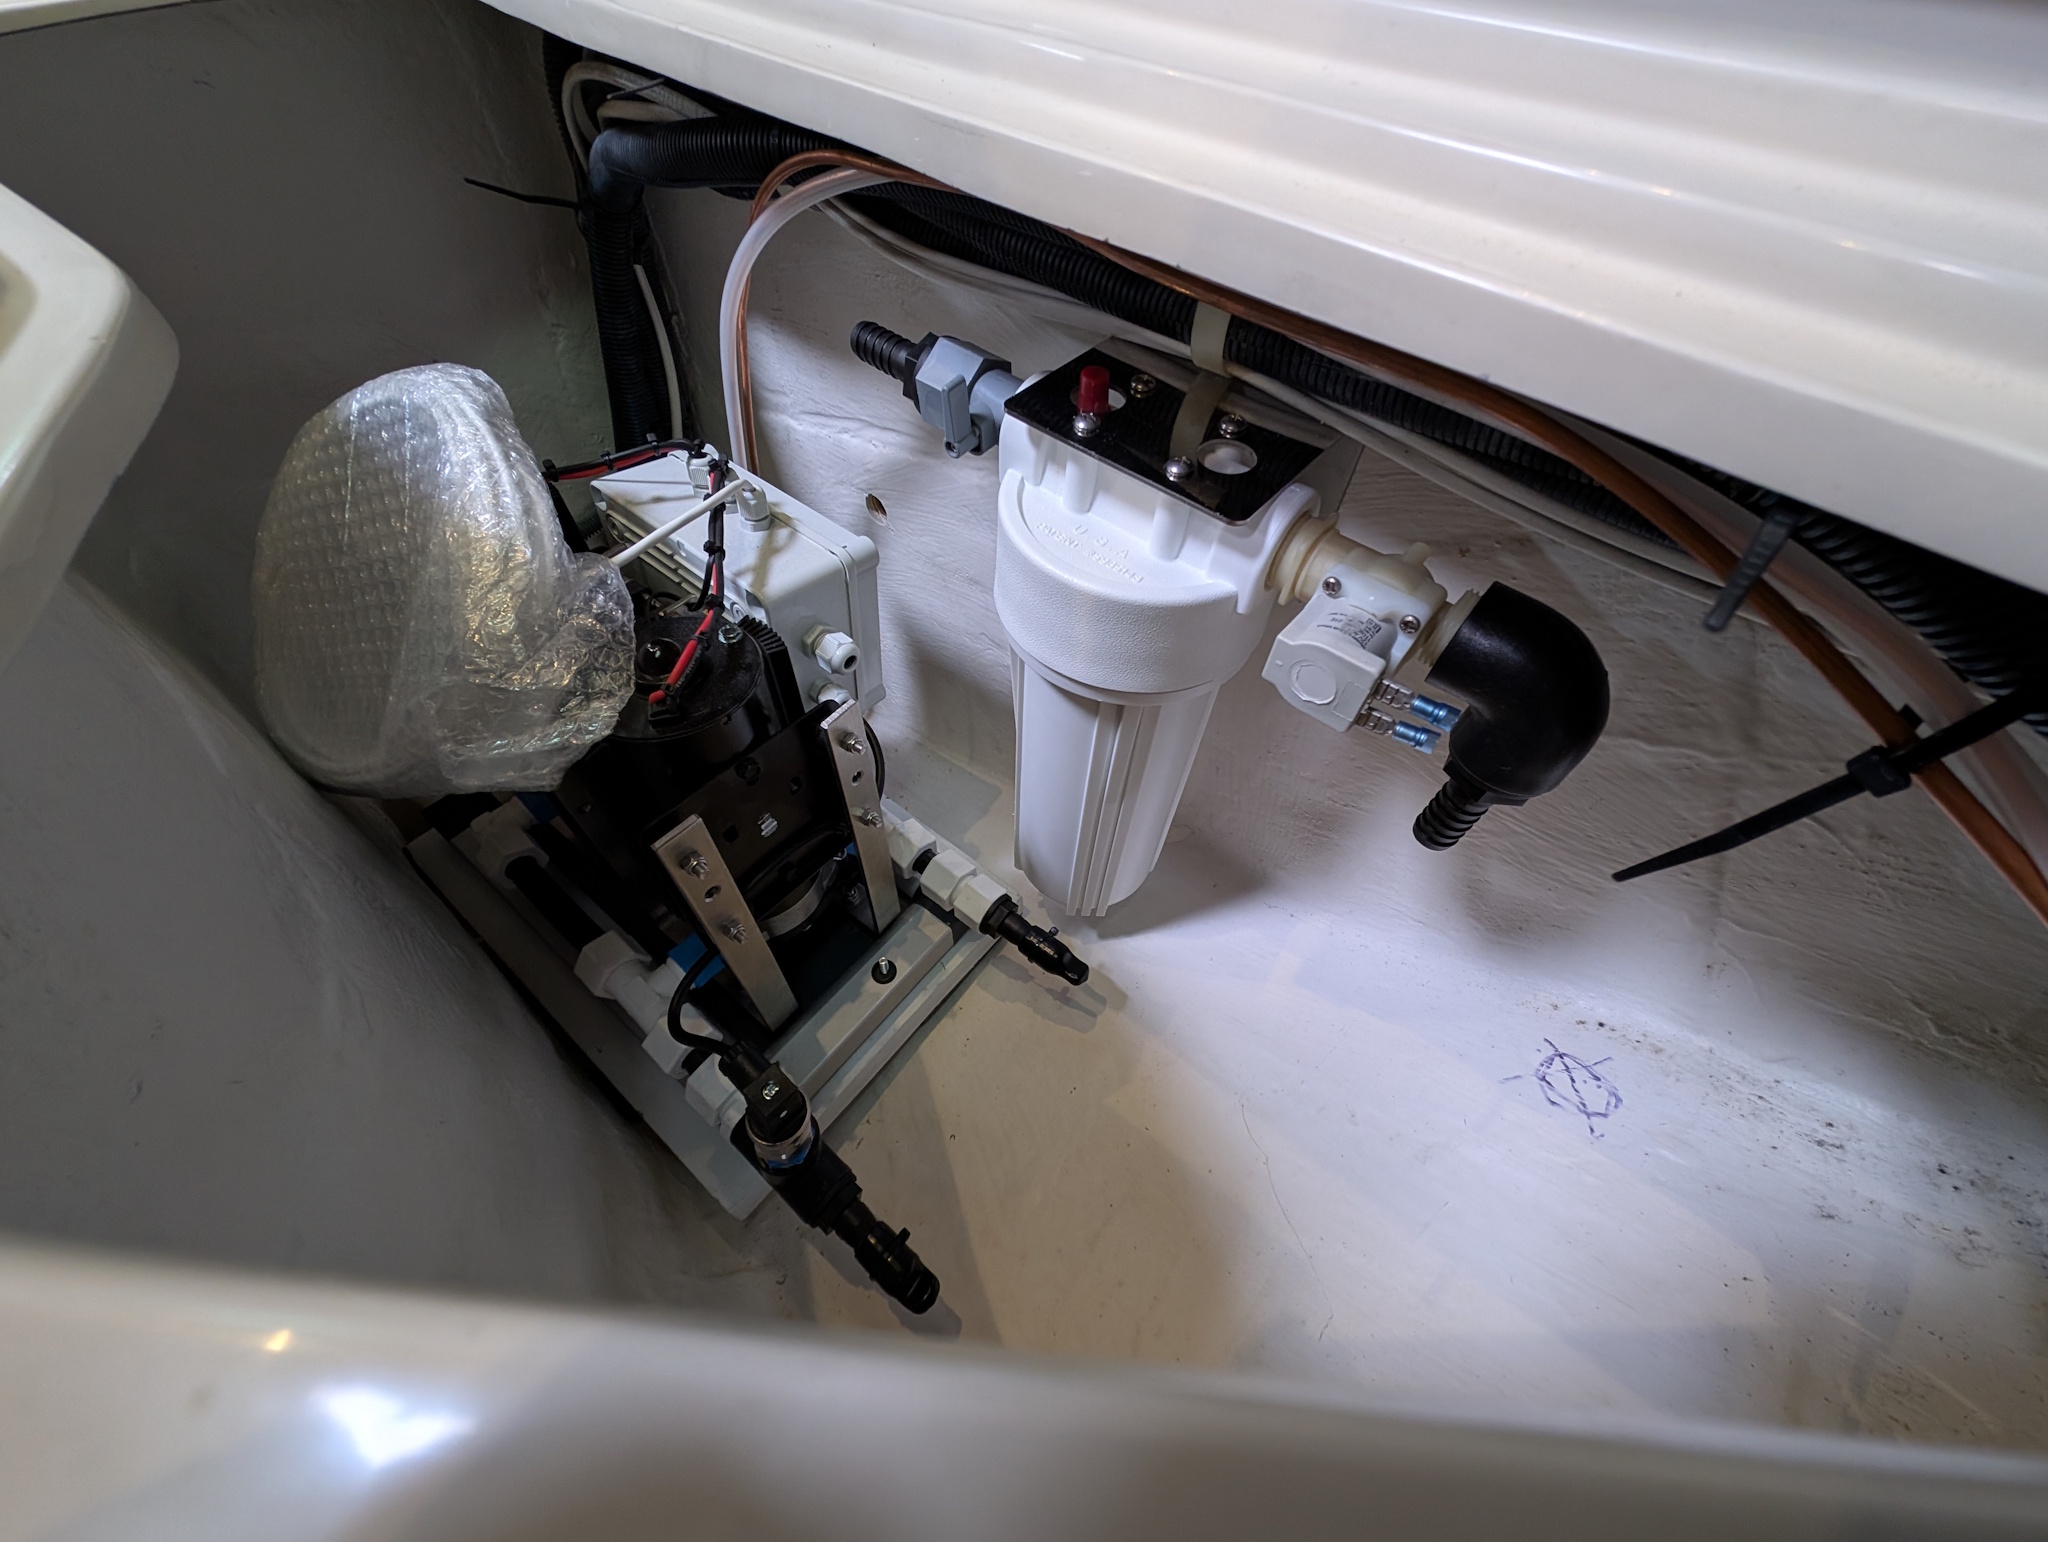
The watermaker main body is required to be mounted on a solid backing. For this, I chose marine plywood, and on the back of it I used all of our spare rubber sealing material from re-lining the fridge and freezer doors, to help with vibration and noise reduction.

The only “modification” I even needed to make to the boat was epoxying a teak block onto the inside of the hull in one settee to mount the backing for the watermaker to; other than that, it was all finding good locations for each component and in the case of the pump group, creating a mount that sits on (and is attached to, using lag bolts) a bulkhead. Nearly everything also has either rubber or neoprene lining between any spots touching the boat for vibration compensation. The watermaker is not particularly quiet, but it’s still a fair bit quieter than the diesel engine.
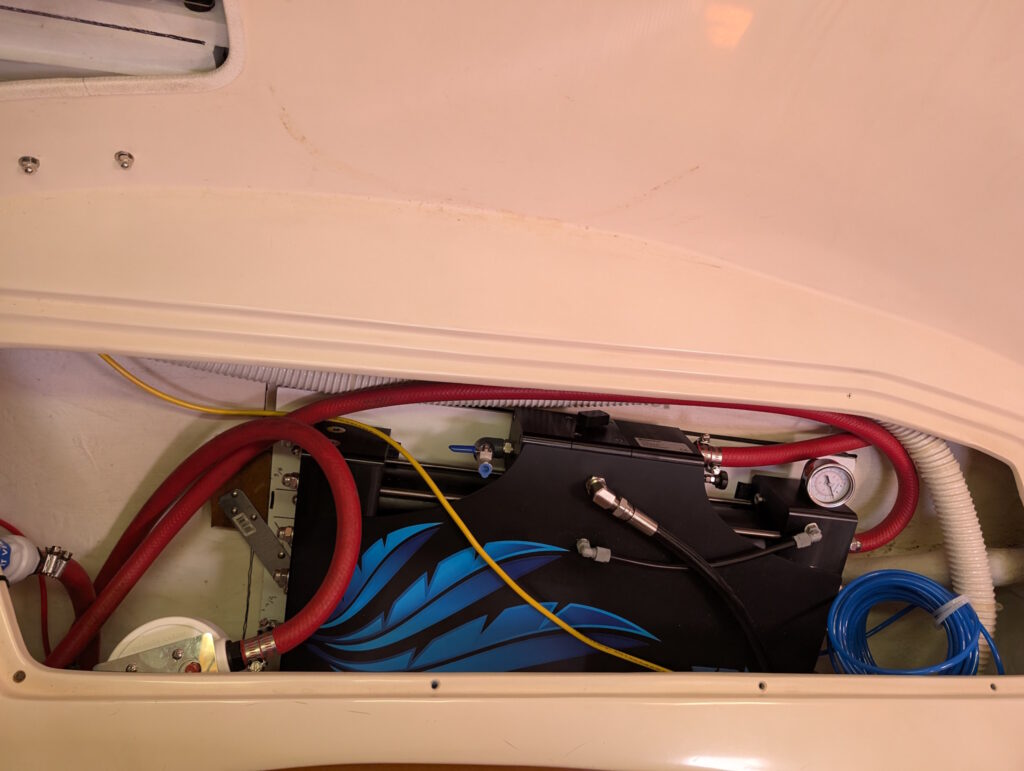
Now we’ve got a working watermaker! It’s plumbed only into our large 50gal forward water tank; to fill the other tanks, we simply need to open the valves between the tanks, because the forward tank is physically above the port & starboard subfloor tanks, so it just gravity-drains into them. After running it through the initial setup and getting the liquid out of the system that came with it (to keep everything in top shape until it was installed) we’re getting incredibly pure water. Today was the first time we actually used it to refill our water tank, and it worked wonderfully. Now we’ve just got to maintain it properly and we have all the water we need, powered by our solar panels!