
While we finish the Raymarine install–just some final mounting things to get done that have been waiting on materials to arrive–plenty more has been done. More of the Raymarine gear is installed, including the rudder sensor and linear drive, the SeaTalkNG/NMEA2000 network has been running beautifully for weeks now, and I’ve gotten the Signal K server all set up. With the last step, I also added a RuuviTag environmental sensor outside that is linked to the CerboGX over bluetooth, providing temperature, humidity, and pressure data.
Solar Panels
The local fabricators I hired–Ballard Marine Fabricators–did a fantastic job with the solar panel mounts. We’ve got three 415W Maxeon panels from SunPoweredYachts mounted over our enclosure:
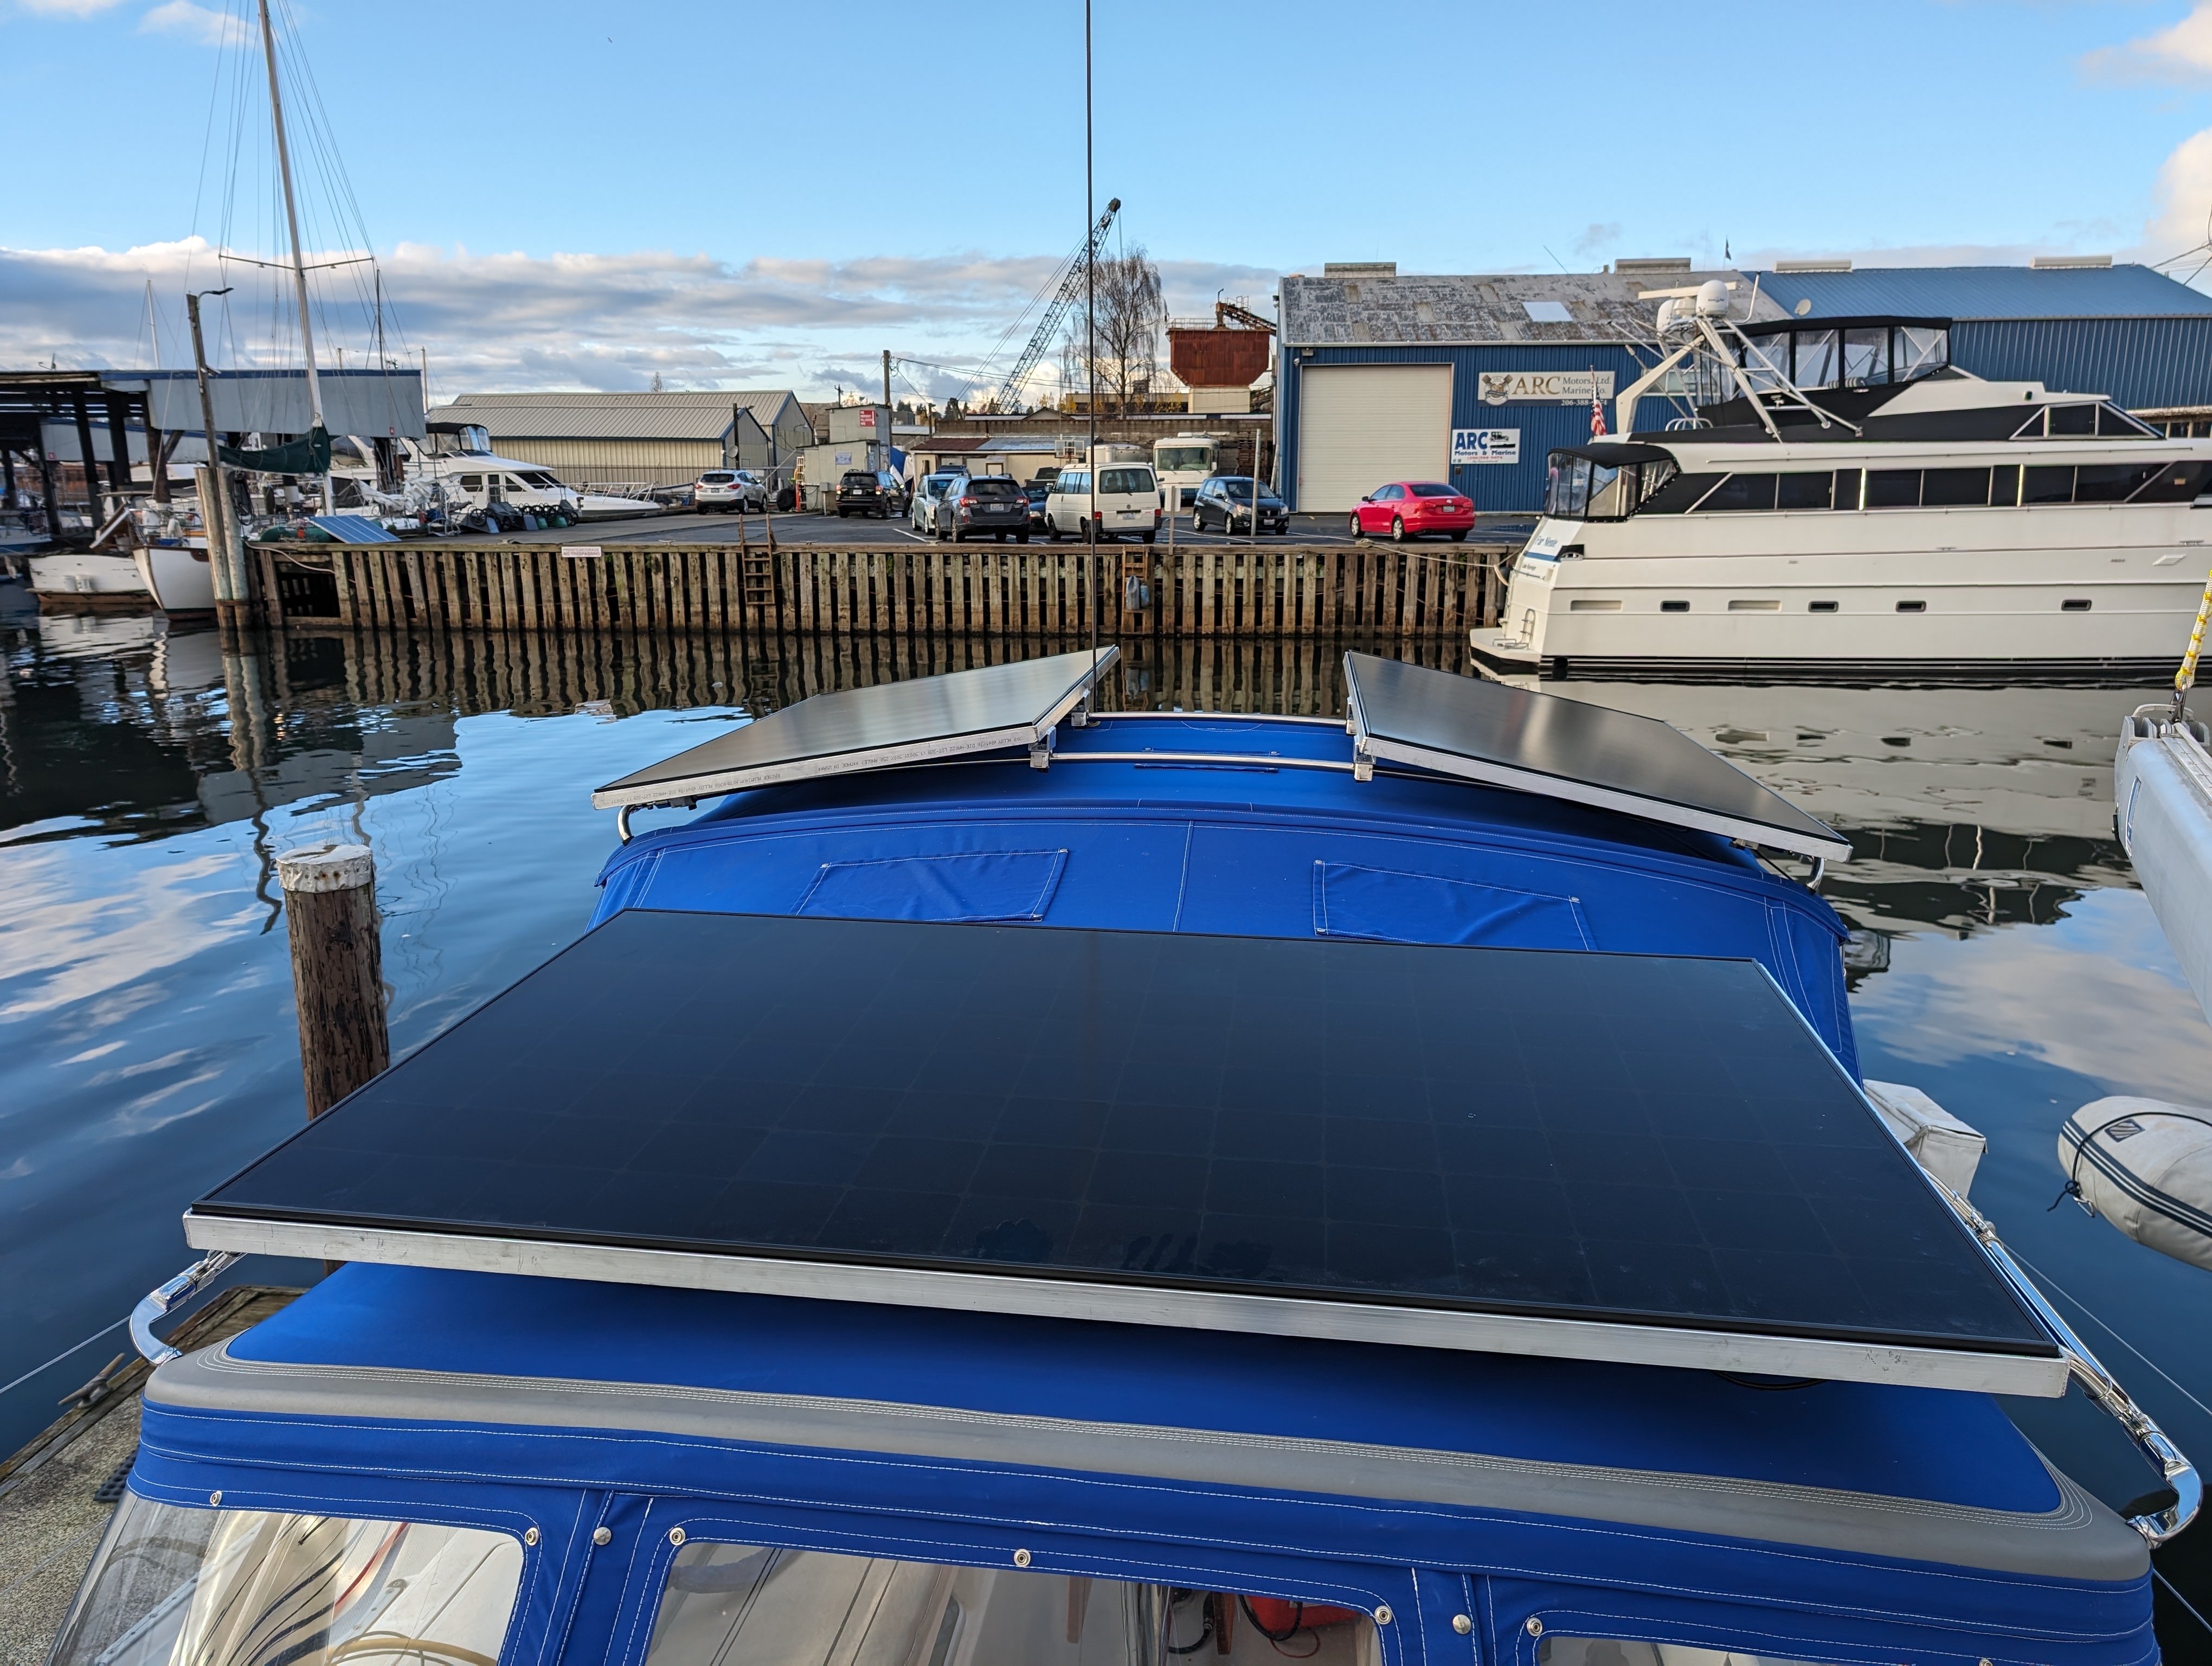
The two towards the stern are hooked up in parallel, and the panel above the dodger will be alone on its MPPT. As for the MPPTs… Look, this is ridiculous overkill. I know. But I wanted to have a little DIY fun and the temperature controllers and fans were cheap. So I made this monstrosity–please forgive the wires, I hadn’t done any zip tying before taking this picture, and the number on the controller on the left is mid-configuration, it was not 41C:
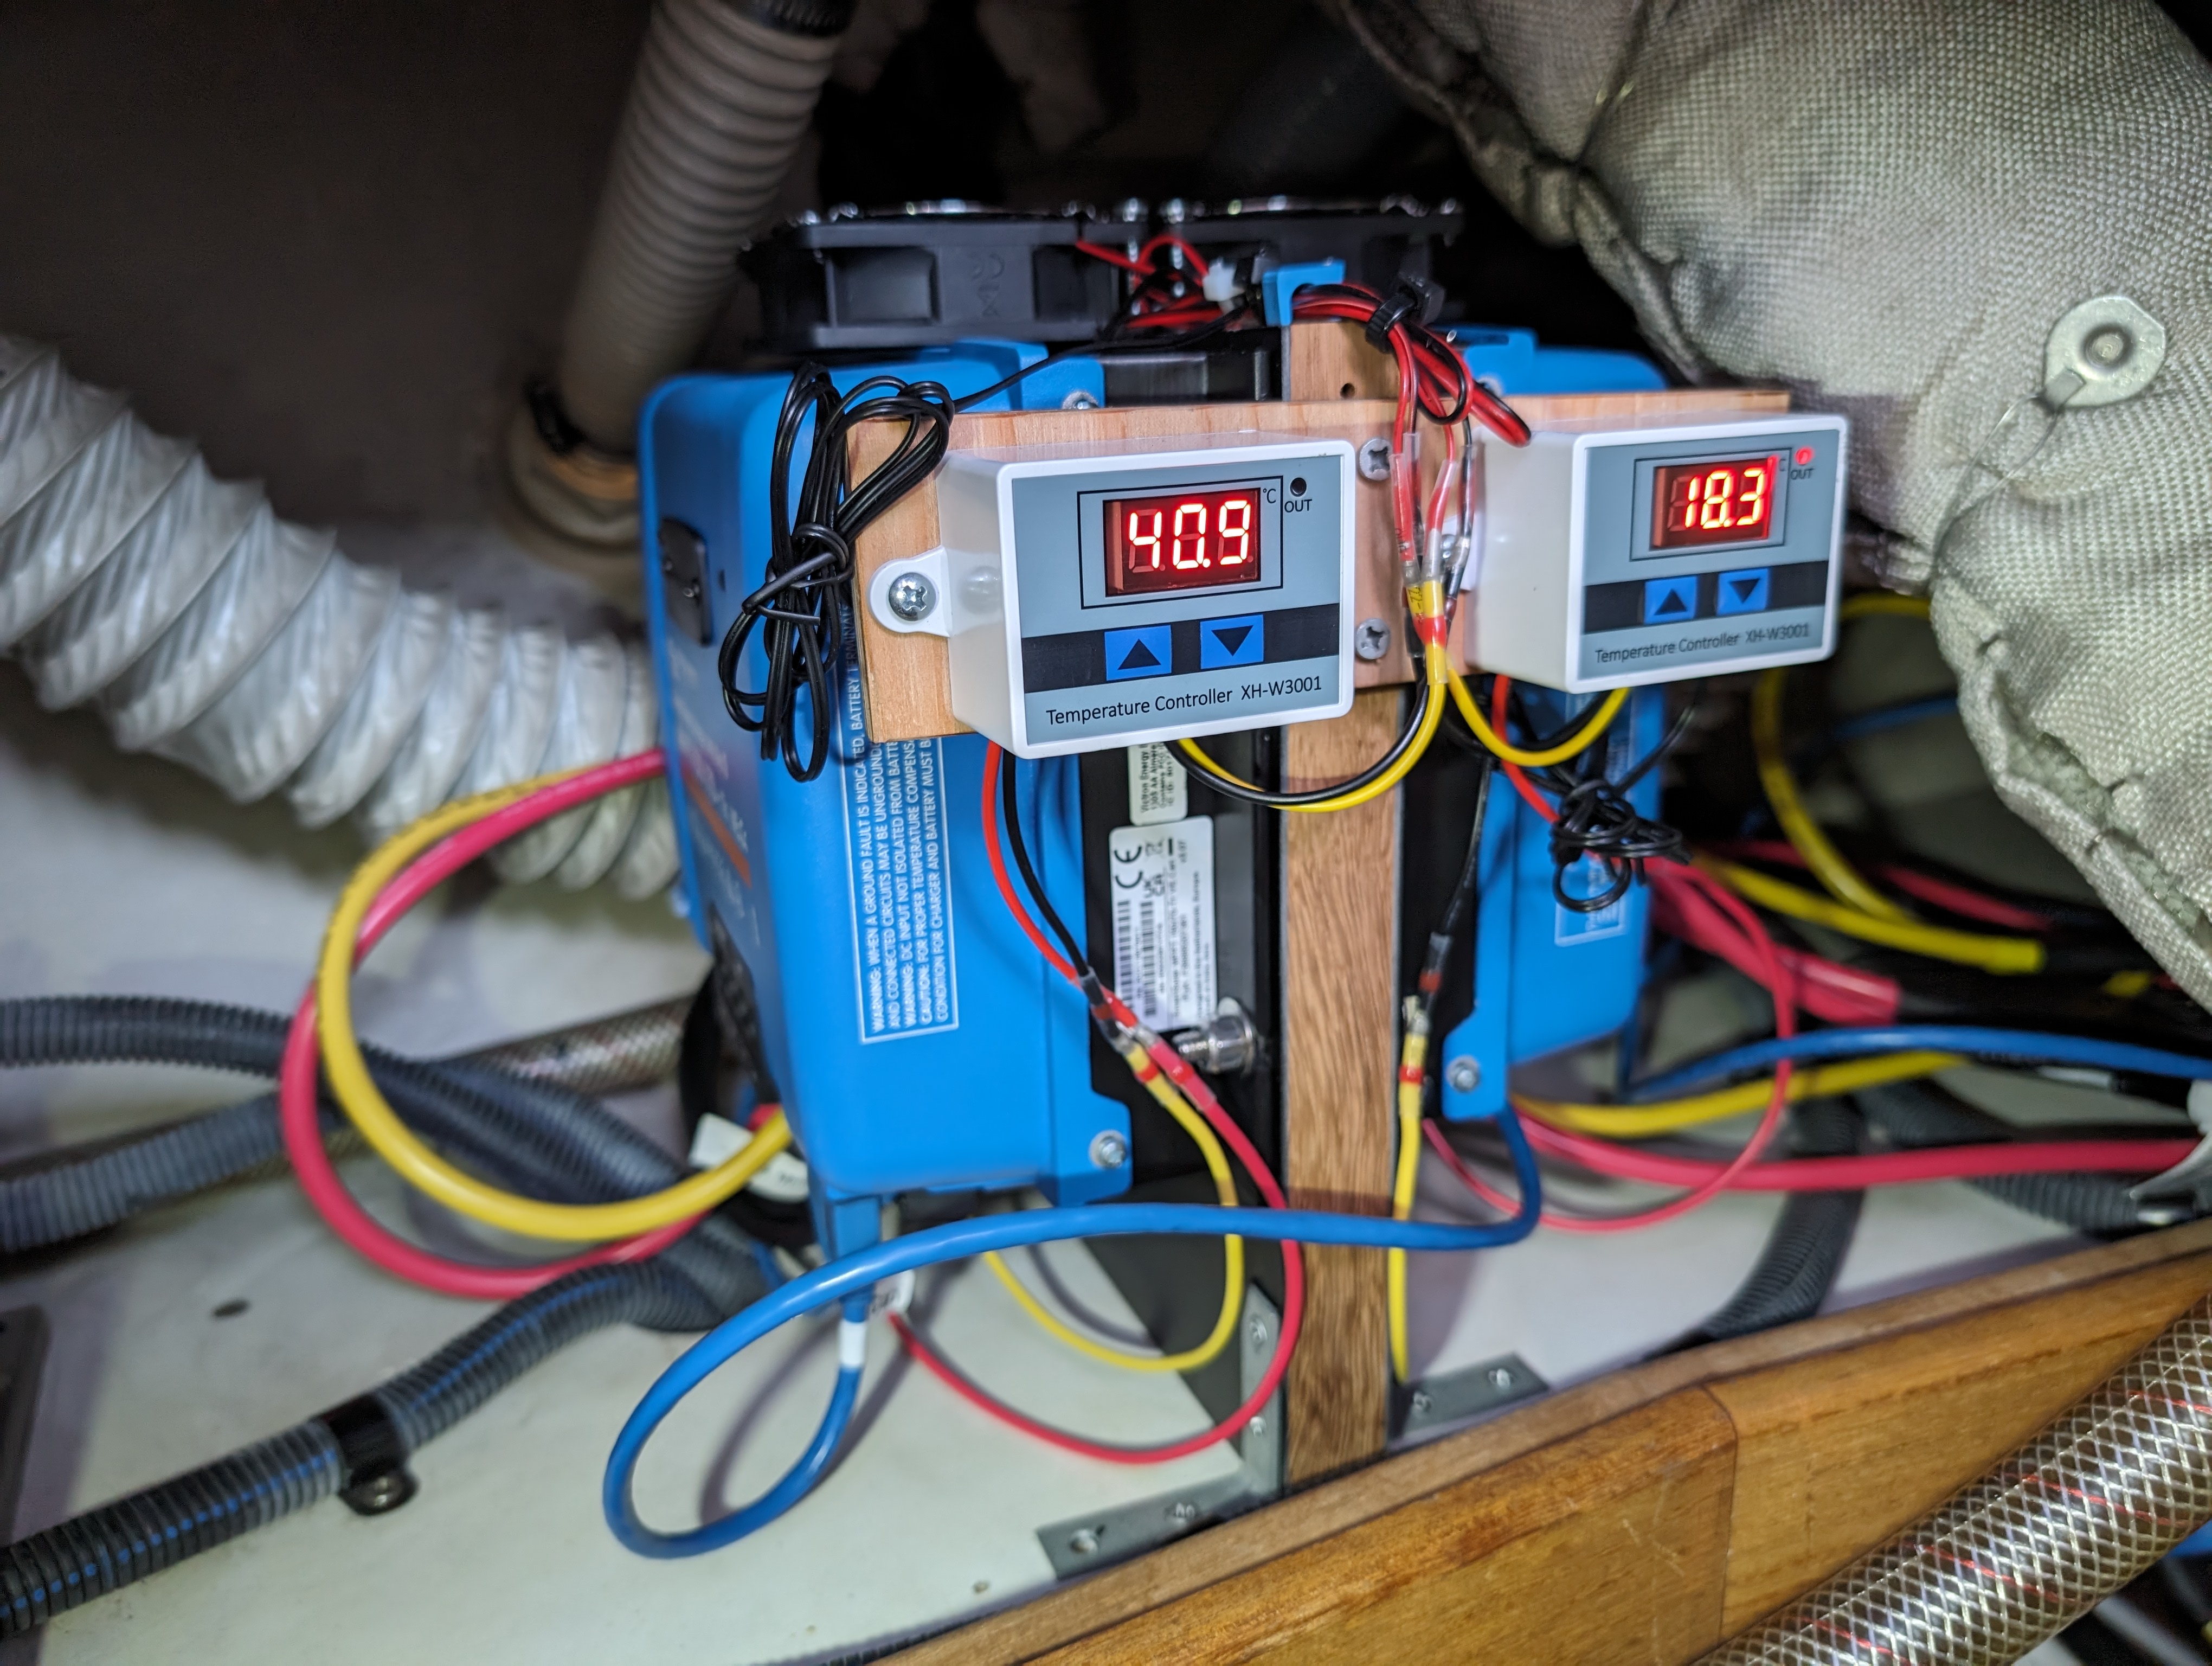
1 inch thick teak, with 1/16th inch FR4 epoxied on each side with System Three Blade Pro (hey, use what you’ve got). A Victron SmartSolar 150/70 VE.Can MPPT mounted on each side, with a temperature controller and a fan for each one. I still need to configure the temperature controllers, the manuals are written in barely-understandable English, but they do work for turning the fans on.
This honestly won’t do much until we get to the heat of the tropics, but should hopefully at least help with performance once we get there, particularly for the MPPT on the left controlling two panels. The one on the right, well, it’ll only be controlling the one panel, and is vastly oversized for that. I’d originally planned for four panels, but that didn’t quite work out.
The two panels at the stern are currently hooked up, using the existing through-deck cable clam with solar power wires that I used with some flexible panels during summer of 2022. Which we’re also planning to reuse eventually, but we’ll talk about that when it happens. Before I can run the wires for the panel over the dodger, I’ll need a string of dry, preferably sunny days to properly drill through the deck, let some epoxy set, and install another cable clam for the second set of wires.
Ethernet network & DataHub
Our network is now a bit more complex than it was previously.
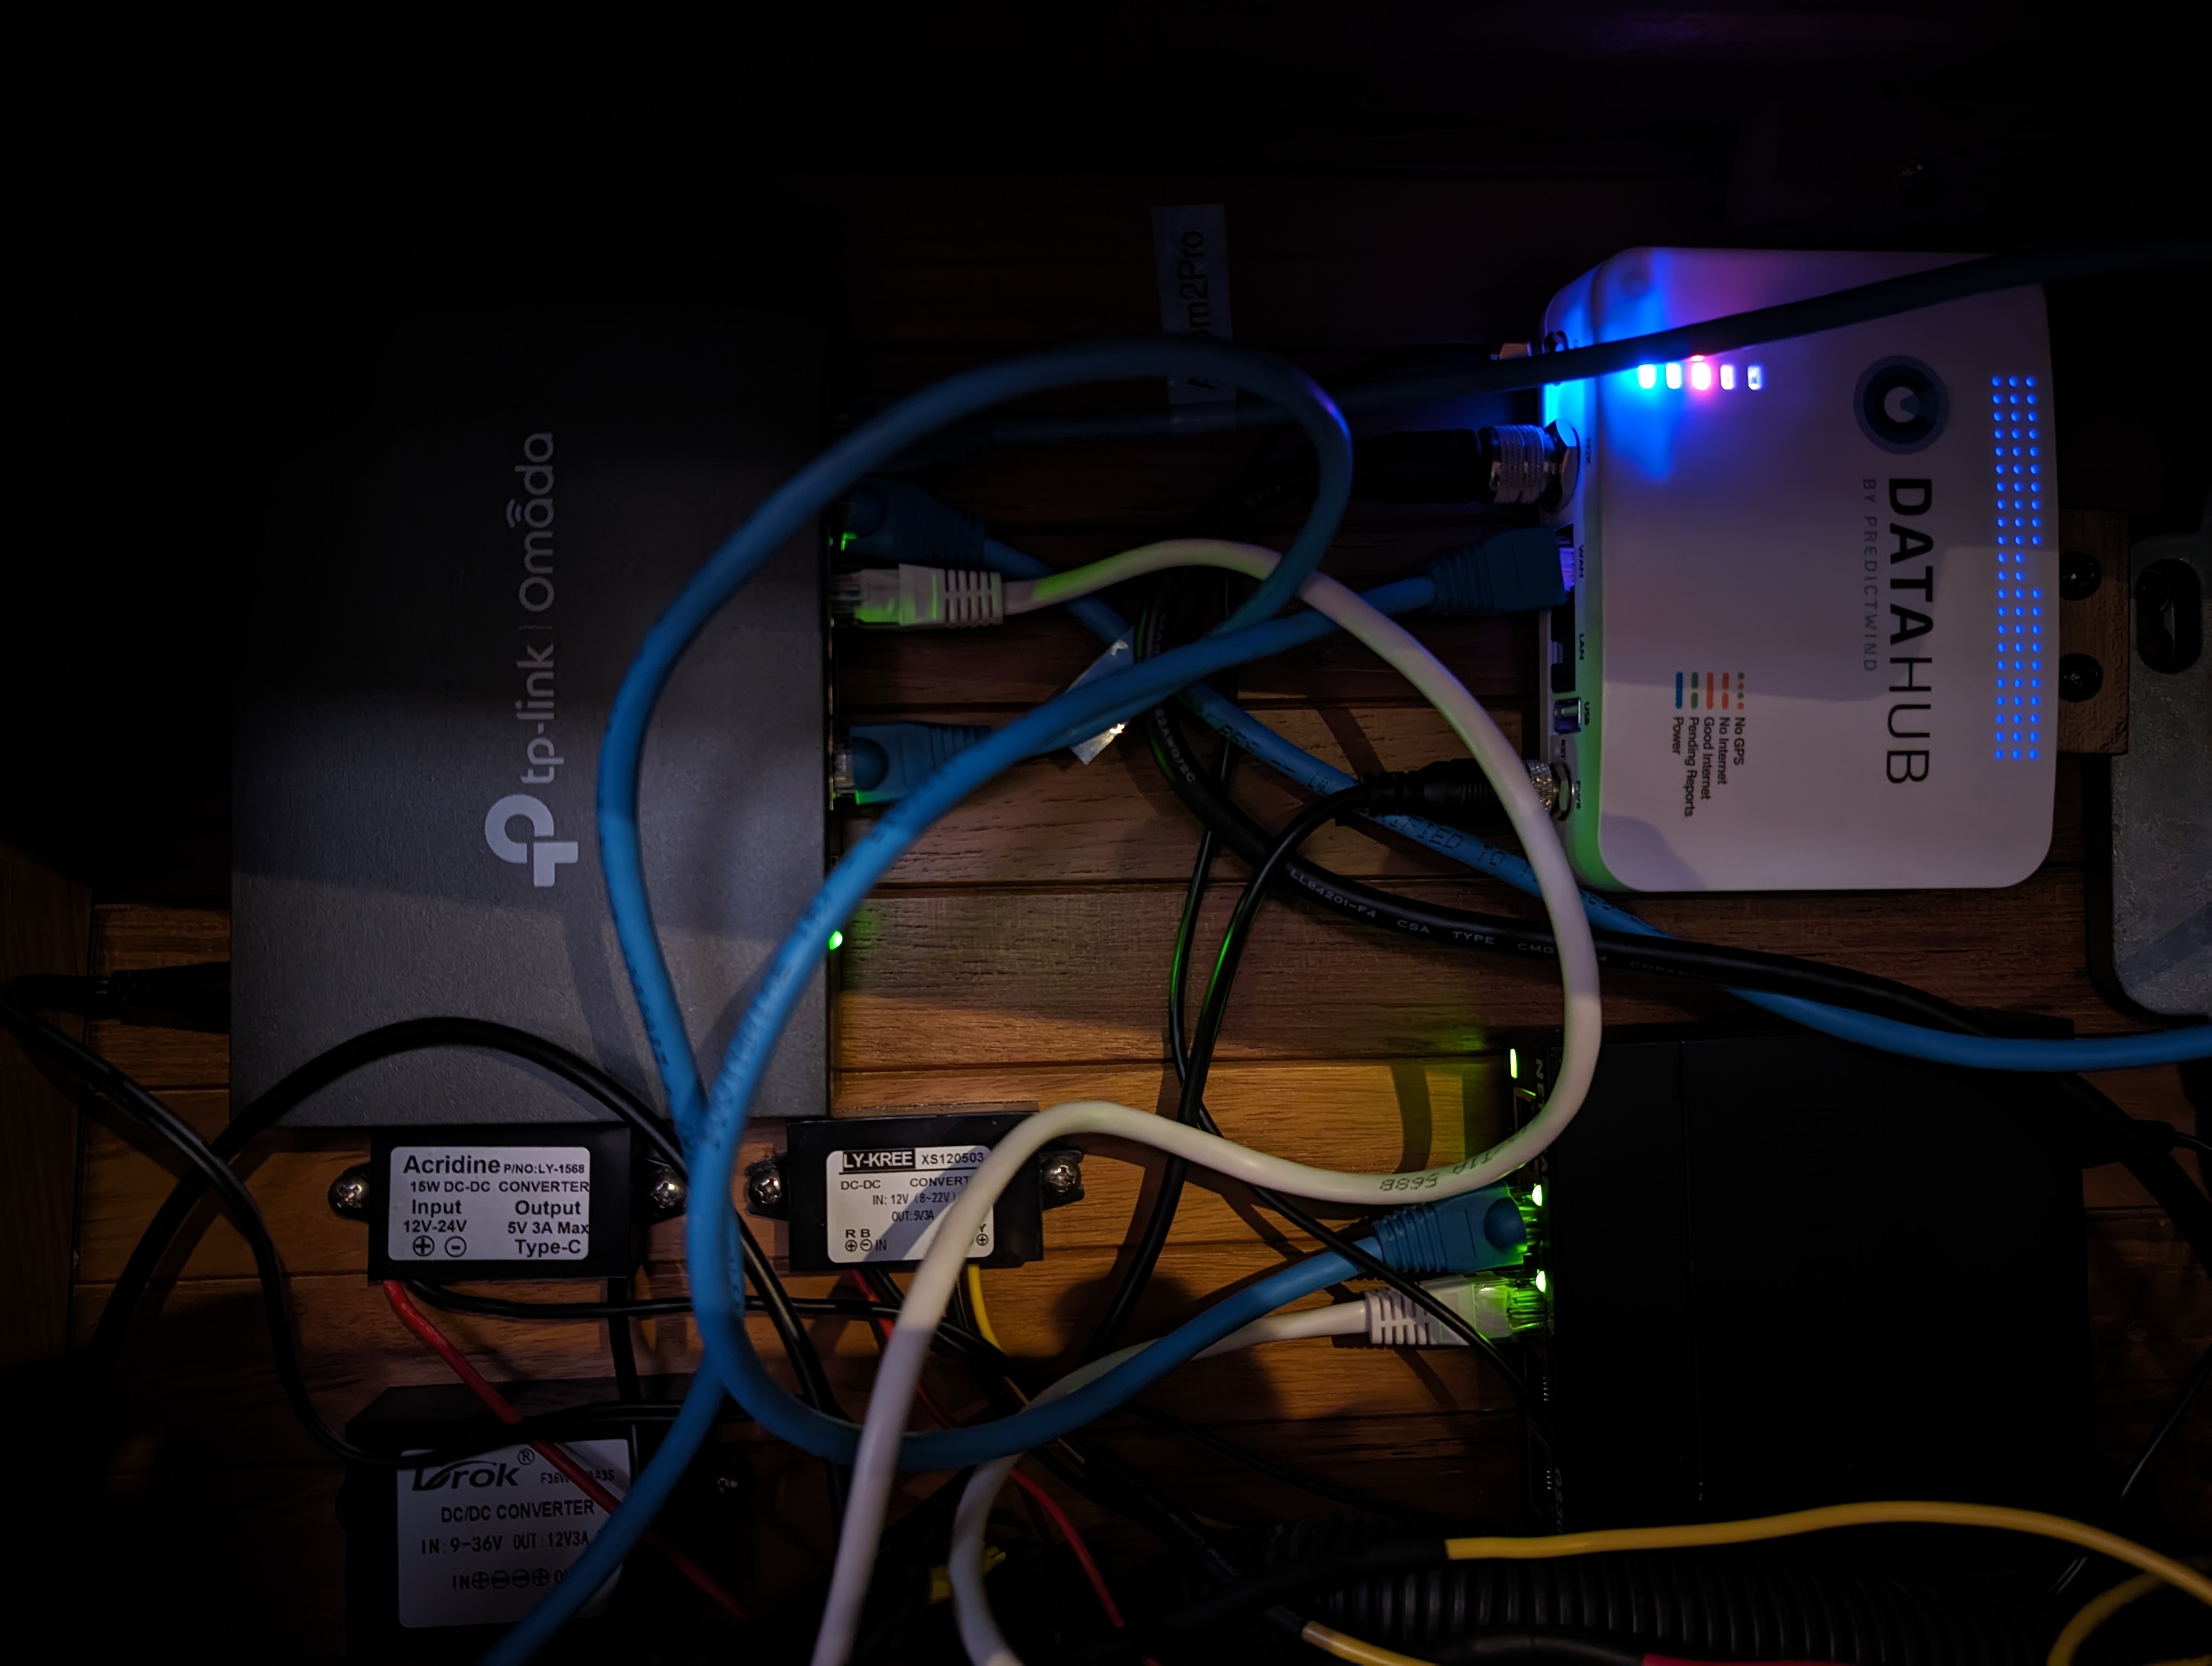
Excusing the wiring mess that I will clean up once I’m done running wires (almost there!), you can see that we’ve got a tp-link router on the left, a switch on the bottom right, and a PredictWind DataHub on the top right.
The router’s WAN connects out to the Netgear 5G router from the previous gear post which provides our internet access. Connected to the LAN ports on the router are the Axiom 2 Pro, the Cerbo GX, and the network switch. Connected to the network switch is the DataHub, and soon the additional open ports on the switch will go to ethernet outlets below the electrical panel next to the stereo.
I had to go this route for a specific reason: the Axiom 2 Pro cannot handle being on an ethernet network with a DHCP server that provides what most people would consider “normal” LAN addresses. In fact, on the current version of the software on the device, it will get into a crash-boot-crash loop if it’s hooked up to a network like this! Now, there is a Raymarine tech article that explains the requirements of their devices on a 3rd party network, so to be able to do that, I needed a router that had a more flexible and configurable DHCP server than what the Netgear 5G router has. Thus the tp-link router. Let’s be clear–most users have no reason to do this since the Axiom will not use the ethernet for internet access as of this writing (only WiFi); the only reason I’m doing it this way is because it’s the only way for the Axiom to communicate with the CerboGX correctly while also keeping the CerboGX connected to the LAN via ethernet rather than WiFi.
The DataHub will provide us with an optimized connection for weather and email when using our Iridium Go Exec, and is also able to help us become a mobile AIS station. It also does very well as a wireless router, and with it connected to the LAN, devices that connect to the DataHub’s WiFi are able to access devices on the LAN, such as the CerboGX (and more importantly, the SignalK server running on it). It’s able to do WiFi bridging as well, as can the Netgear 5G router–time will tell which one has a better WiFi range for bridging, and whether that will even matter for us. Besides network connections, the DataHub is also connected into our NMEA2000 network, allowing it to do all kinds of other things like PredictWind’s AI polars.
Another benefit of the tp-link router is I was able to assign a static IP to the CerboGX, which is important for keeping bookmarks to the SignalK apps on our phones and laptops for quick access. An example, from my phone:
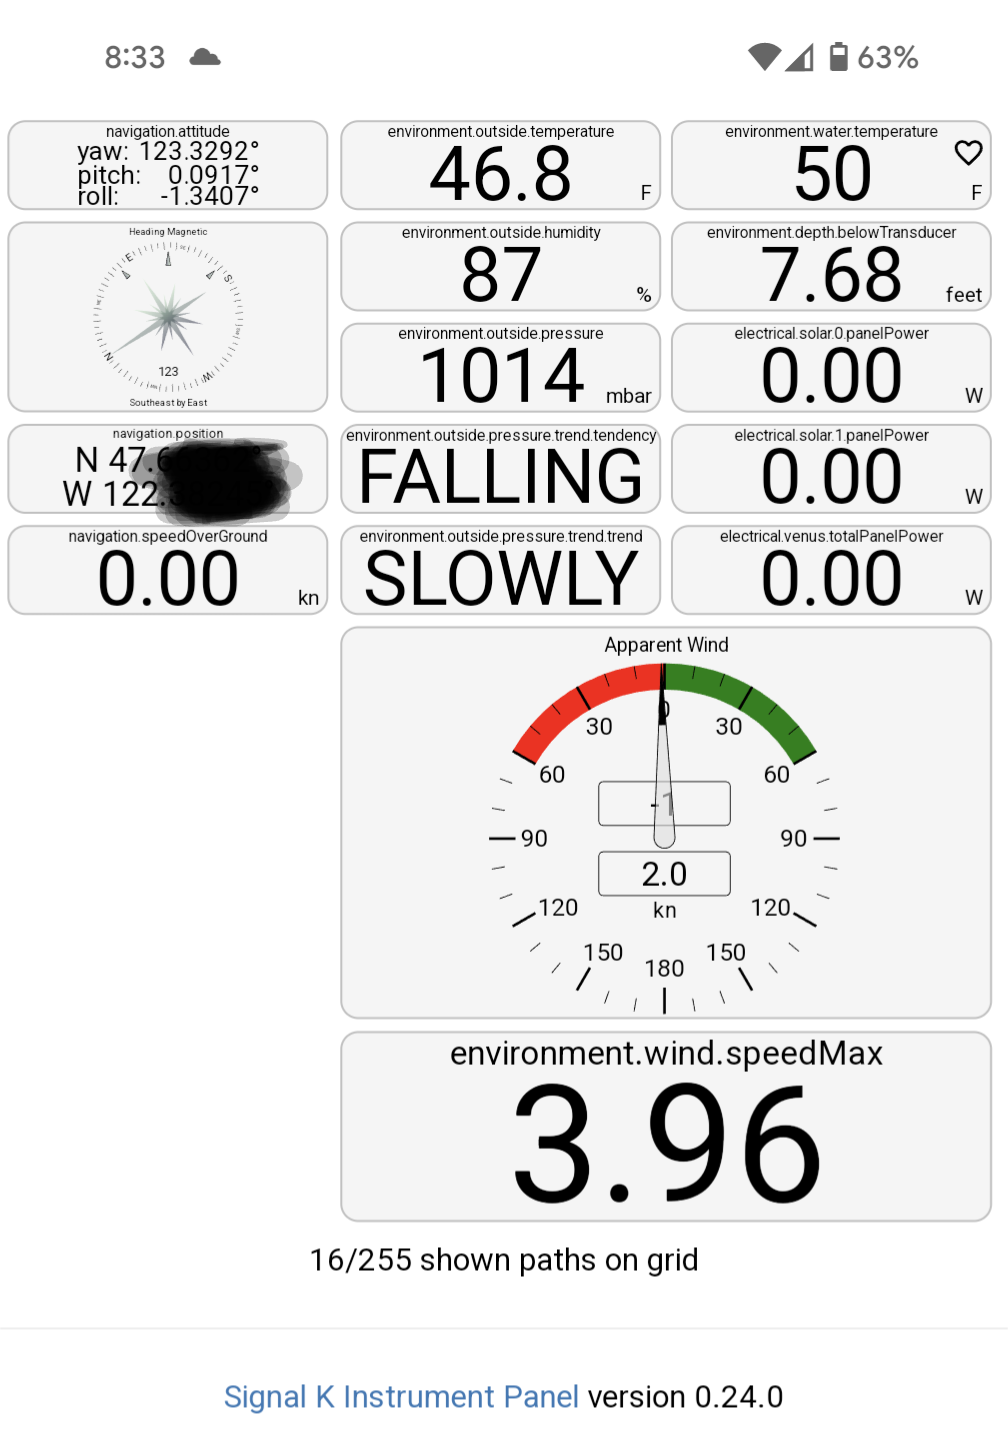
This Instrument Panel app allows me to display any information I want in customizable formats. This is accessible by any device on our network and updates in real time, and is also available to either one of us remotely as long as the boat has access to the internet (not satellite) through Victron’s VRM. There are other apps as well, but that is better saved for another post.
New sails arrived
We haven’t had the time to raise it yet but earlier this week I just picked up our new mainsail and trysail from Ballard Sails. Once I pick up the finished lines for the vang, we’ll put the last of the new running rigging in along with raising and furling this new Hydra Net furling main. Ballard Sails will be coming around in early January for us to raise the trysail and plan the correct rigging options for it, and I need to do something similar (though easier) with the ATN Gale Sail soon.
Watermaker Prep
I’ve also just recently started the planning for some of the more detailed aspects of the watermaker installation, such as the plumbing and placement of the pump. I’m currently hoping/believe I can use an existing through-hull, and know I can use some existing sink outlets, and other Catalina 42 owners in a Facebook group had good advice on the plumbing into the tanks, so there’s just a few more pieces of advice I need to seek and then some of the fabrication bits of the installation can begin, starting with the mount for the watermaker itself. But that is material for another post.
Hopefully I’ll finish the mounting for the Axiom 2 Pro soon and can post finished pictures of the Raymarine install!